How to Add Talking Captions to PowerPoint Presentations

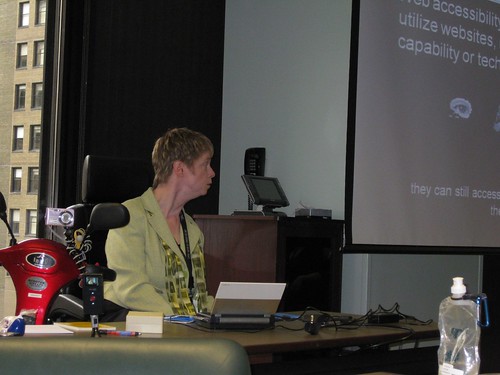
(Photo credit: Becky McCray)
The Dilemma
Create an amazing and fully captioned PowerPoint presentation for SOBCon: Biz School for Bloggers.
I had created a captioned presentation for AccessCamp San Antonio, but the synthesized voice of Kate wasn’t linked to the captions. Too many keyboard strokes were required, which meant too much room for error while presenting.
I needed a way to link the speech files to the captions and to minimize the keyboard strokes required during the presentation.
The Solution
Before creating the PowerPoint slides, I added caption boxes to the Master Slides, using Glenna Shaw’s wonderful tutorial as a guide. After some tweaks (which I may share later), several late nights and way too much Lindt 90% dark chocolate, I figured how to add talking captions to PowerPoint presentations.
As you will see from the video (or the step-by-step instructions below), the process is tedious, mind-numbing and very time consuming. For the most part, the video is the actual time it took me to complete each step to add the talking captions for the first slide. (My SOBCon presentation had 35 slides!) Of course, adding the captions came after the content was written and the slides were created.
The Video
The Step-by-Step Instructions
For those individuals who prefer written instructions, here they are:
- Write the text in Microsoft Word or any word processor.
- Copy a caption-length of text.
- Paste it into the text-to-speech program TextAloud.
- In the Title box, type a filename using the format slide number hyphen caption number (e.g., slide 1-1) for easy identification.
- Listen to the text being spoken to determine whether any tweaks are needed so that the pronunciation and speed sound ok.
- Save the file.
- Switch to PowerPoint 2007 and paste the caption text into the first caption box on the first slide. (How the caption boxes are created may be the subject of another post.)
- So that the captions scroll during the presentation, the animation added when the caption boxes were created now need to be activated. Click on the Animation tab along the top, and then click Custom Animation. The Custom Animation panel opens on the right side of the screen.
- On the first box that reads Layout:Body, choose Copy Effects to Slide from the dropdown box. This adds all of the caption boxes to the animation list.
- Link the speech file to the caption by choosing Effect Options from the first animation’s dropdown box.
- A dialog box pops up. From there, click on Sound and type the letter o for the short cut to Other Sound…
- Locate and select the speech file. Click OK. The first talking caption is complete.
- Repeat the process for each caption.
- Remove the unused boxes so that blank boxes do not appear in the presentation by zooming out to 20% to view the slide and all of the caption boxes and then select the unused boxes.
- On the Custom Animations panel, click Remove. This removes the unused boxes from the animation list. However they still remain on the slide, which is handy in case more captions need to be added later to the slide. The unused boxes will not appear in the presentation because they have been removed from the animation list.
- Repeat the entire for each slide show.
- See what the presentation actually looks like by hitting F5 to begin the slide show.
- Appropriately reward yourself!
The Result
A rockin’ presentation at SOBCon!
Although the process is tedious, mind-numbing and time-consuming, the end result is impressive. Captions and slides are advanced by hitting the space bar. Should I accidentally hit the space twice, the error is quickly rectified by hitting the back arrow key. It means I, with a significant speech impairment, can give a captivating presentation!
Why am I sharing this?
For three reasons:
- Creating this video was an experiment to see if I could and how long it would take me to create a fully-captioned instructional video using Camtasia for the screen captures and the voice of Kate. (The answer: three days!)
- In case someone else in a similar situation can use this solution. Or, if this solution may spark other ideas or uses.
- To invite feedback and ideas on how to simplify or improve this process. I would like to give more presentations of this nature, but it is a rather time-consuming project. Preparing presentations this way, I could only prepare 3-5 per year, realistically.
Comments are open. Let’s hear your ideas!
If you enjoyed this post, consider buying me a chai tea latte. Thanks kindly.
 Subscribe via RSS


